

这篇博文侧重环境,动态和静态,确定与不确定,结构与非结构化等。
如何利用ROS、OpenAI和Gazebo构建一种动态、不确定、非结构化的复杂环境,
用于机器人和人工智能算法的测试呢?
参考链接:
行人模型:
更多内容稍后补充。
参考gazebosim官网文档:http://gazebosim.org
制作动画模特(演员actor)
本教程适用于Gazebo 8+版本(Gazebo 8/9/10均可)
概述
本教程解释了如何使用Gazebo的“actor”来创建脚本动画。
如果希望在模拟仿真中使用预定义路径的实体而不受物理引擎影响,则动画非常有用。这意味着它们不会因重力而下落或与其他物体碰撞。然而,它们将具有可由RGB相机看到的3D可视化,以及可由基于GPU的深度传感器检测的3D网格。
该教程详细解释了如何创建不与模拟其余部分交互的开环轨迹。接下来,将快速浏览一个示例插件,该插件根据环境反馈控制动画。
演员actor
在Gazebo中,动画模型被称为actor。Actors扩展了常见模型,增加了动画功能。
有两种类型的动画可以单独使用或组合使用:
- 骨架动画,是一个模型中链接之间的相对运动
- 沿着轨迹运动,将全世界所有演员的链接作为一个整体
- 两种类型的动作都可以组合起来,以实现在世界中移动的骨架动画
Gazebo的演员就像模特一样 ,所以你可以像往常一样把链接和关节放在里面。主要区别是:
-
演员总是静止的(即没有施加力,无论是重力还是接触或其他任何东西)
-
Actors支持从COLLADA和BVH文件导入的骨架动画。
-
演员可以在SDF中直接编写轨迹。
-
不能有嵌套在actor中的模型,因此我们仅限于动画网格,链接和关节。
提示:在此处查看
<actor>SDF元素 的完整规范。
脚本轨迹
这是演员的高级动画,包括指定在特定时间到达的一系列姿势。Gazebo负责插入它们之间的运动,因此运动是流动的。
示例世界
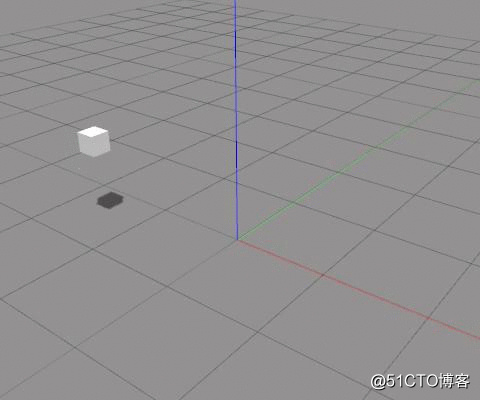
让我们来看看Gazebo附带的简单示例世界:
gazebo worlds/animated_box.world你会看到一个浮动的盒子一次又一次地以方形轨迹移动。轨迹经过四点世界,并在它们之间需要1秒。[-1, -1, 1][-1, 1, 1][1, 1,1][1, -1, 1]
代码解析
可以在这里看到整个世界的描述 。按部分来学习一下。
首先定义一个地平面和光源(太阳)的世界。
<?xml version="1.0" ?>
<sdf version="1.6">
   <world name="default">
      <!-- A ground plane -->
      <include>
         <uri>model://ground_plane</uri>
      </include>
      <!-- A global light source -->
      <include>
         <uri>model://sun</uri>
</include>创建了一个名为的actor,animated_box并给它一个带有视觉框的简单链接:
      <!-- An actor -->
      <actor name="animated_box">
        <link name="link">
          <visual name="visual">
            <geometry>
              <box>
                <size>.2 .2 .2</size>
              </box>
            </geometry>
          </visual>
</link>现在是actor演员,<script>标签特有的部分。首先告诉它永远循环,并在世界加载后立即开始播放。
        <script>
          <loop>true</loop>
          <delay_start>0.000000</delay_start>
          <auto_start>true</auto_start>
可以使用以下参数:
-
loop:将此设置为true,以便在循环中重复脚本。对于流体连续运动,确保最后一个航路点与第一个航路点匹配,如下所示。 -
delay_start:这是在启动脚本之前等待的时间(以秒为单位)。如果在循环中运行,则在开始每个循环之前将等待此时间。 -
auto_start:如果动画应在模拟开始播放后立即启动,则设置为true。如果动画只应在插件触发时才开始播放,则将其设置为false很有用。
最后,定义了一系列航点的轨迹(waypoint):
          <trajectory id="0" type="square">
             <waypoint>
                <time>0.0</time>
                <pose>-1 -1 1 0 0 0</pose>
             </waypoint>
             <waypoint>
                <time>1.0</time>
                <pose>-1 1 1 0 0 0</pose>
             </waypoint>
             <waypoint>
                <time>2.0</time>
                <pose>1 1 1 0 0 0</pose>
             </waypoint>
             <waypoint>
                <time>3.0</time>
                <pose>1 -1 1 0 0 0</pose>
             </waypoint>
             <waypoint>
                <time>4.0</time>
                <pose>-1 -1 1 0 0 0</pose>
             </waypoint>
          </trajectory>
        </script>
      </actor>
   </world>
</sdf>在<trajectory>标签内,可以描述一系列要遵循的关键帧。它有两个属性:一个是唯一的id和一个type。当在下一节中解释骨架动画时,该类型将非常有用。轨迹参数如下:
-
waypoint:轨迹中可以有任意数量的航点。每个航路点由atime和a组成pose:-
time:以脚为单位的时间,从脚本开头算起,应该达到姿势。 -
pose:应该达到的姿势
-
提示:定义航点的顺序并不重要,它们将遵循给定的时间。
注意:轨迹整体平滑。这意味着您将获得流畅的运动,但可能无法达到航路点中包含的确切姿势。
提示:非演员模型也可以遵循脚本轨迹,但这需要使用插件。请参阅本教程以了解具体方法。
现在轮到你实践了!在继续下一部分之前,尝试不同的trejctory描述!
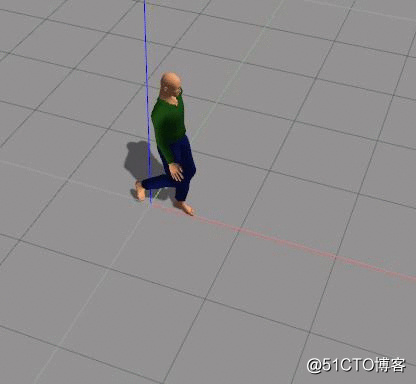
骨架
Gazebo支持两种不同的骨架动画文件格式: COLLADA(.dae)和 Biovision Hierarchy(.bvh)。
尝试一下Gazebo附带的简单示例文件。首先,创建一个新的世界文件:
gedit walk.world并粘贴以下SDF,它有一个sun和一个使用walk.dae 作为皮肤的 actor:
<?xml version="1.0" ?>
<sdf version="1.6">
<world name="default">
<include>
<uri>model://sun</uri>
</include>
<actor name="actor">
<skin>
<filename>walk.dae</filename>
</skin>
</actor>
</world>
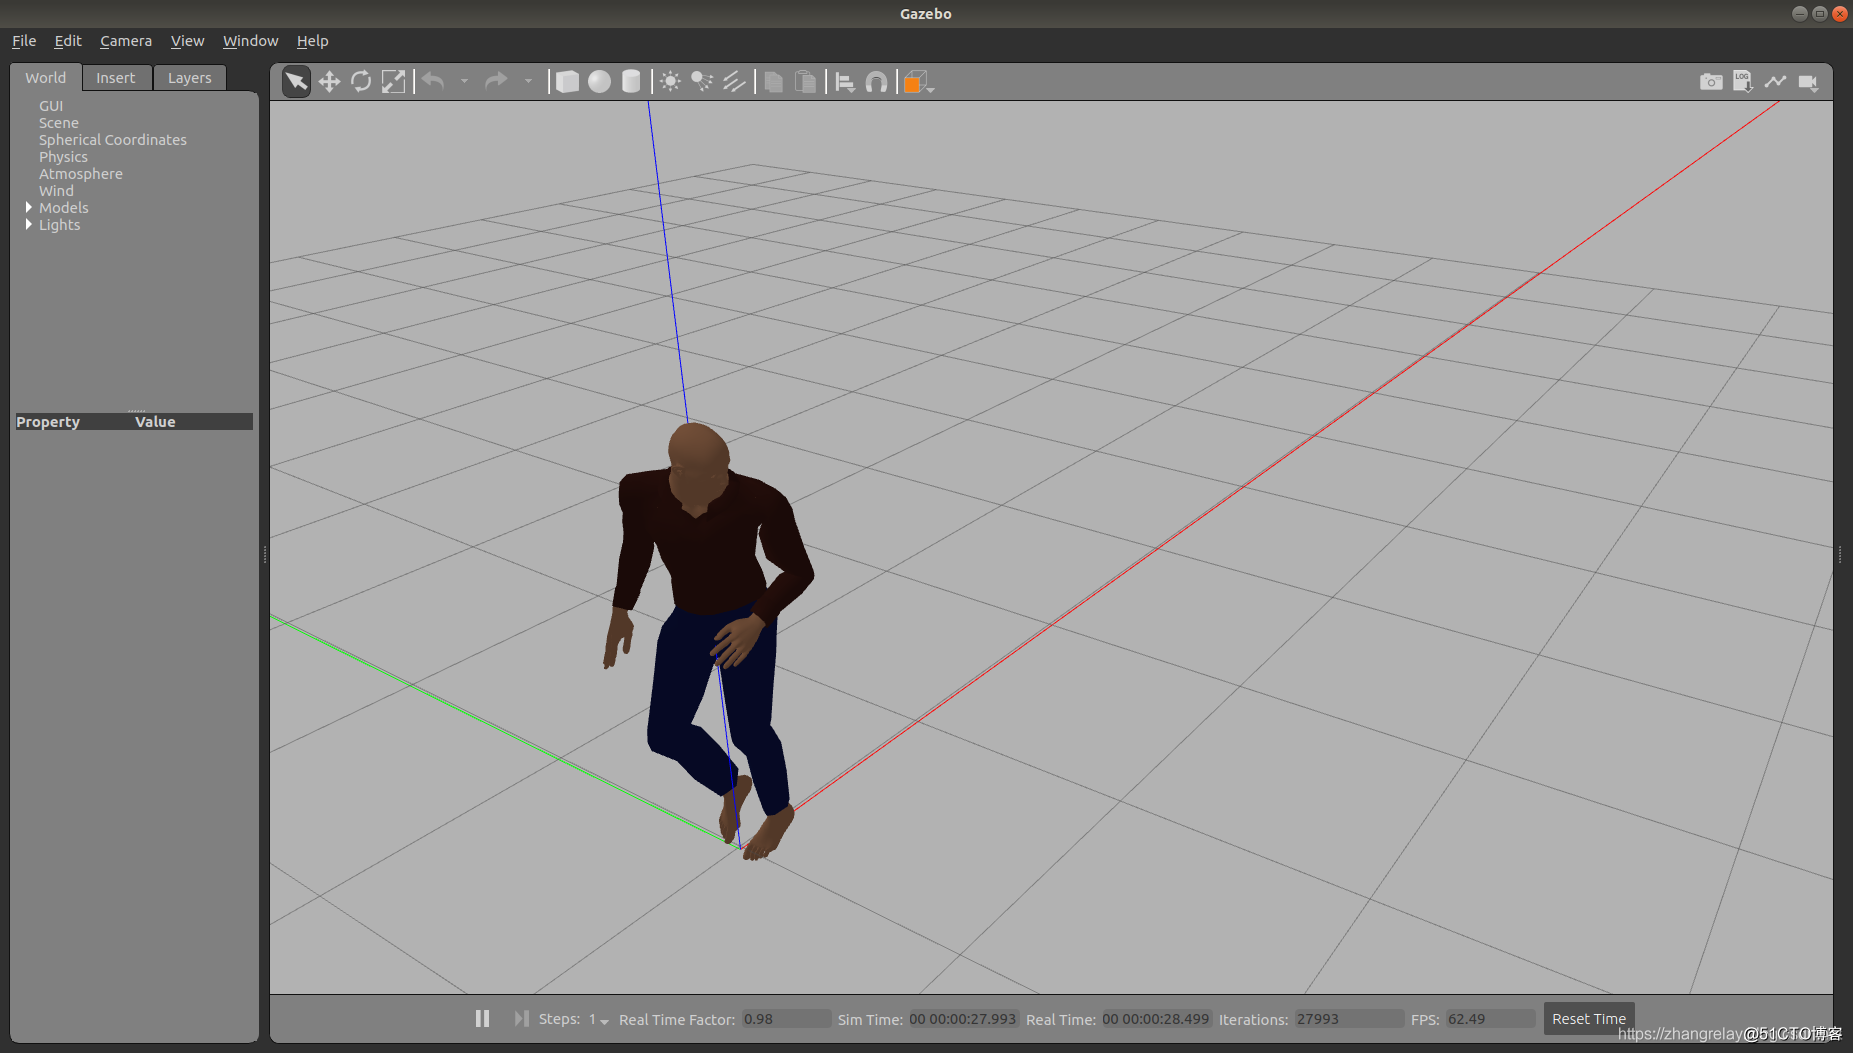
</sdf>在Gazebo看看它,会看到一个人在原地走动。
gazebo walk.world皮肤
上面示例中的actor非常简单,它加载的所有内容都是<skin>标记中描述的COLLADA文件。
注意:如果之前制作过 自定义 Gazebo模型,则可能已将COLLADA文件用作模型的视觉效果和碰撞。在链接中使用时,COLLADA动画会被忽略,但在皮肤中使用时,它们会被加载!
指定的文件<filename>可以是绝对路径,例如:
/home/<user>/my_gazebo_models/skeleton_model/skeleton.dae还可以告诉Gazebo在环境变量中包含的所有目录中查找网格 GAZEBO_MODEL_PATH,如下所示:
model://skeketon_model/skeleton.dae最后,可以使用一些与Gazebo一起安装的示例网格,直接引用它们的文件名。以下是可用的列表。看看他们中的一些代替上面的walk.world
moonwalk.daerun.daesit_down.daesitting.daestand_up.daestand.daetalk_a.daetalk_b.daewalk.dae
动画
结合不同的皮肤和动画
有时,将不同的皮肤与不同的动画组合起来很有用。Gazebo允许我们从一个文件中获取皮肤,从另一个文件中获取动画,只要它们具有兼容的骨架。
例如,文件和兼容,这样他们可以相互混合。走路的人有一件绿色衬衫,月球徒步者穿着一件红色衬衫。walk.daemoonwalk.dae
-
如果想一个人月球漫步与绿色衬衫,使用
walk对皮肤和moonwalk为动画。 -
如果想一个人走了红衬衣,使用
moonwalk对皮肤和walk为动画。
动画标签与皮肤标签一起使用,它需要一个name参数。像这样:
<?xml version="1.0" ?>
<sdf version="1.6">
  <world name="default">
    <include>
      <uri>model://sun</uri>
    </include>
    <actor name="actor">
      <skin>
        <filename>walk.dae</filename>
      </skin>
      <animation name="animation">
        <filename>moonwalk.dae</filename>
      </animation>
    </actor>
  </world>
</sdf>提示:查看本教程以了解有关COLLADA动画的更多信息。在凉亭的背景下,作为皮肤COLLADA文件必须有
<library_effects>和<library_materials>,而动画文件必须有<library_animations>。要一起使用,两个文件必须匹配<library_geometries>,<library_controllers>并且<library_visual_scenes>。
立即尝试不同的组合!
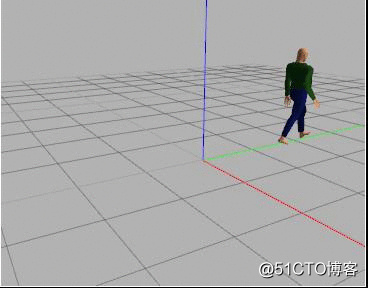
同步动画和轨迹
到目前为止,已经了解了创建轨迹和加载静态动画的所有信息。是时候学习如何组合它们了。
可能会想“只是添加<skin>,<animation>并<trajectory> 标记给我的演员,将一起工作”。继续尝试,我甚至会给你一个例子:
<sdf version="1.6">
  <world name="default">
    <include>
      <uri>model://sun</uri>
    </include>
    <actor name="actor">
      <skin>
        <filename>walk.dae</filename>
      </skin>
      <animation name="animation">
        <filename>walk.dae</filename>
      </animation>
      <script>
        <trajectory id="0" type="walking">
          <waypoint>
            <time>0</time>
            <pose>0 2 0 0 0 -1.57</pose>
          </waypoint>
          <waypoint>
            <time>2</time>
            <pose>0 -2 0 0 0 -1.57</pose>
          </waypoint>
          <waypoint>
            <time>2.5</time>
            <pose>0 -2 0 0 0 1.57</pose>
          </waypoint>
          <waypoint>
            <time>7</time>
            <pose>0 2 0 0 0 1.57</pose>
          </waypoint>
          <waypoint>
            <time>7.5</time>
            <pose>0 2 0 0 0 -1.57</pose>
          </waypoint>
        </trajectory>
      </script>
    </actor>
  </world>
</sdf>
继续加载它,看看会发生什么。这不是预期,对吗?演员的腿根本不动。那是因为Gazebo不知道哪个动画与哪个轨迹匹配。所以让改变动画名称以匹配轨迹类型,如下所示:
      <animation name="walking">
        <filename>walk.dae</filename>
      </animation>
好吧,所以演员都在世界上来回移动,并且移动他的腿。但那看起来不太自然,对吧?他的脚在地上滑动。
骨架动画在X轴上包含一个平移组件,通过运行没有任何轨迹的动画来注意到这一点。但是这个动画还没有与轨迹同步。可以通过<interpolate_x>在内部设置为true 来启用它 <animation>。
      <animation name="walking">
        <filename>walk.dae</filename>
        <interpolate_x>true</interpolate_x>
</animation>注意:
y或者z轴没有插值标记,因此请确保您的原位动画沿x轴移动。
现在终于让两个动画完美同步了。应该看到这个人从一侧走到另一侧,一个方向更快,另一个方向更慢。
闭环轨迹
刚学会了如何创建演员并通过SDF设置他们的轨迹。对此的限制是轨迹在开环中运行,也就是说,它没有从环境中获取任何反馈。现在来看看如何使用插件改变轨迹的示例。
提示:如果不熟悉Gazebo插件,请先查看一些插件教程。
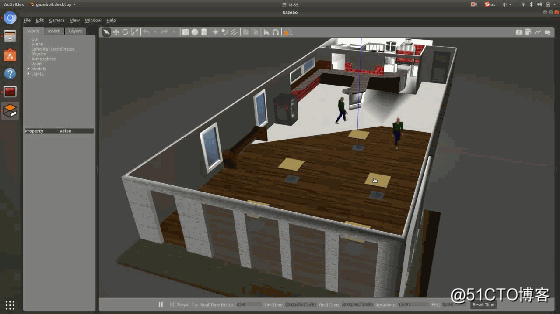
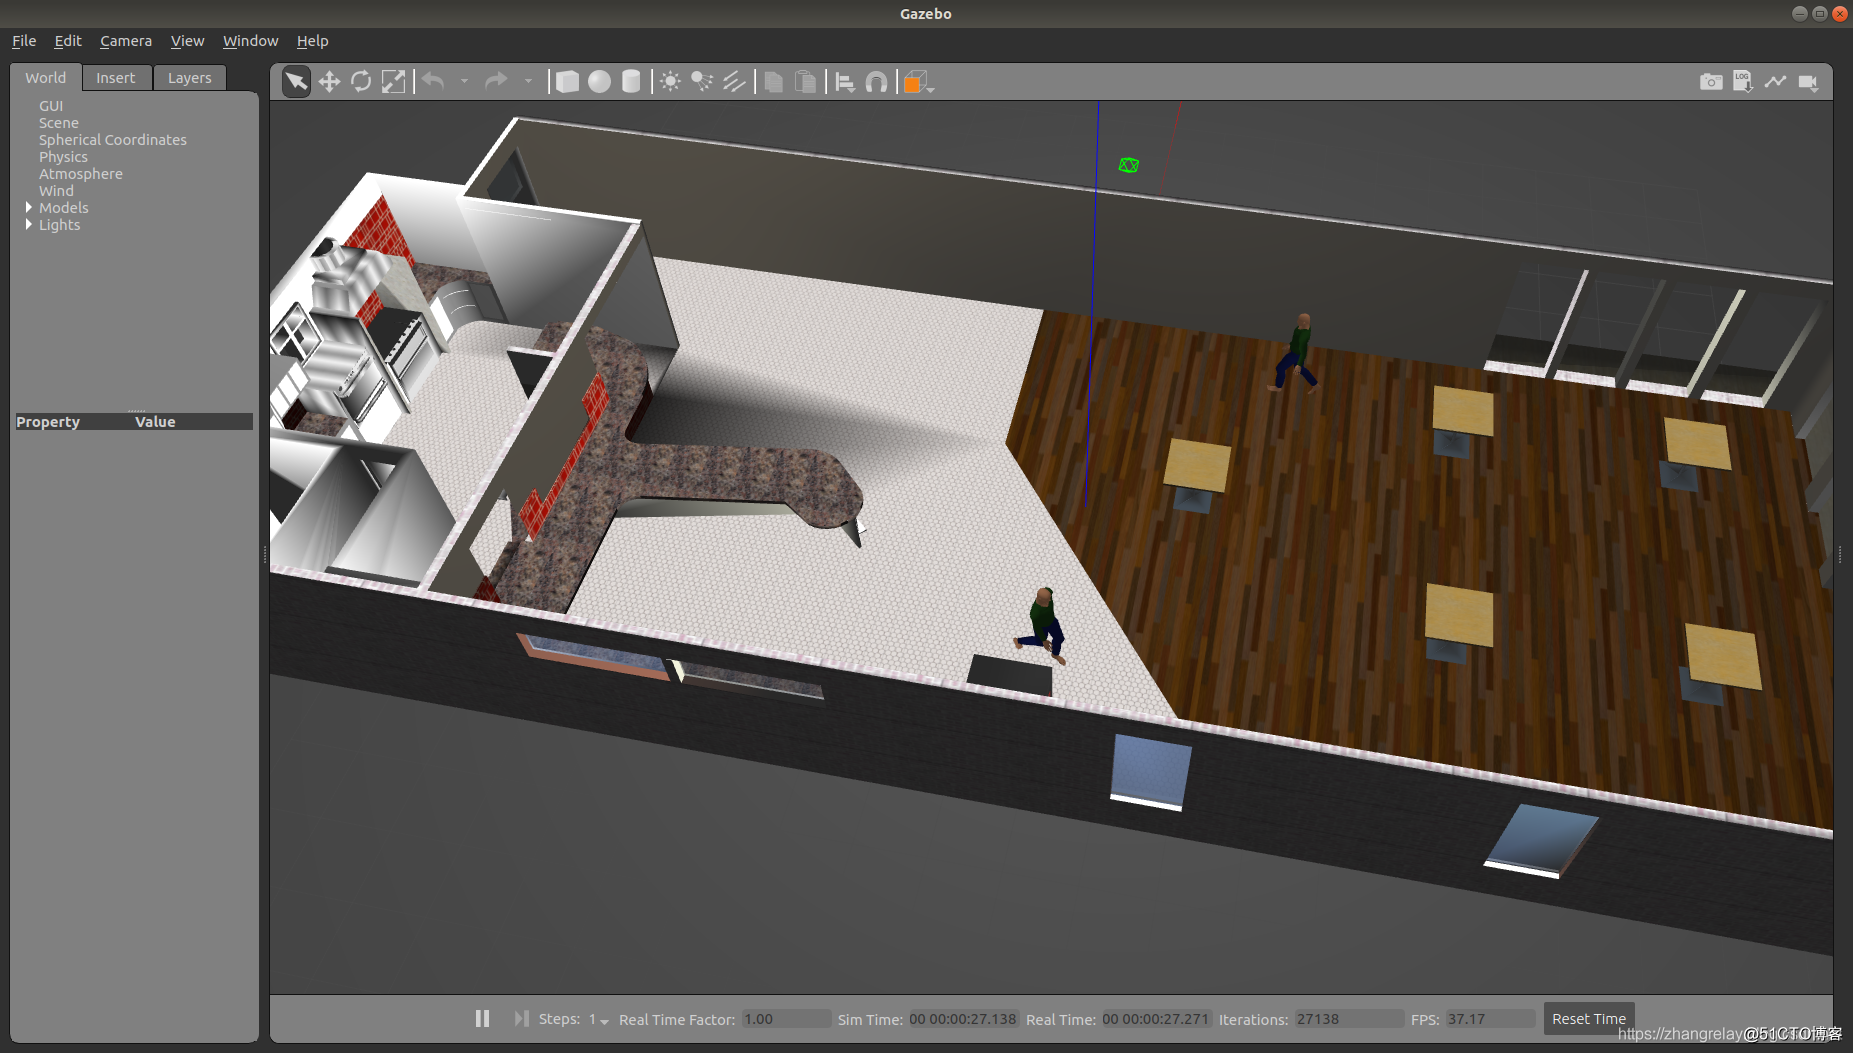
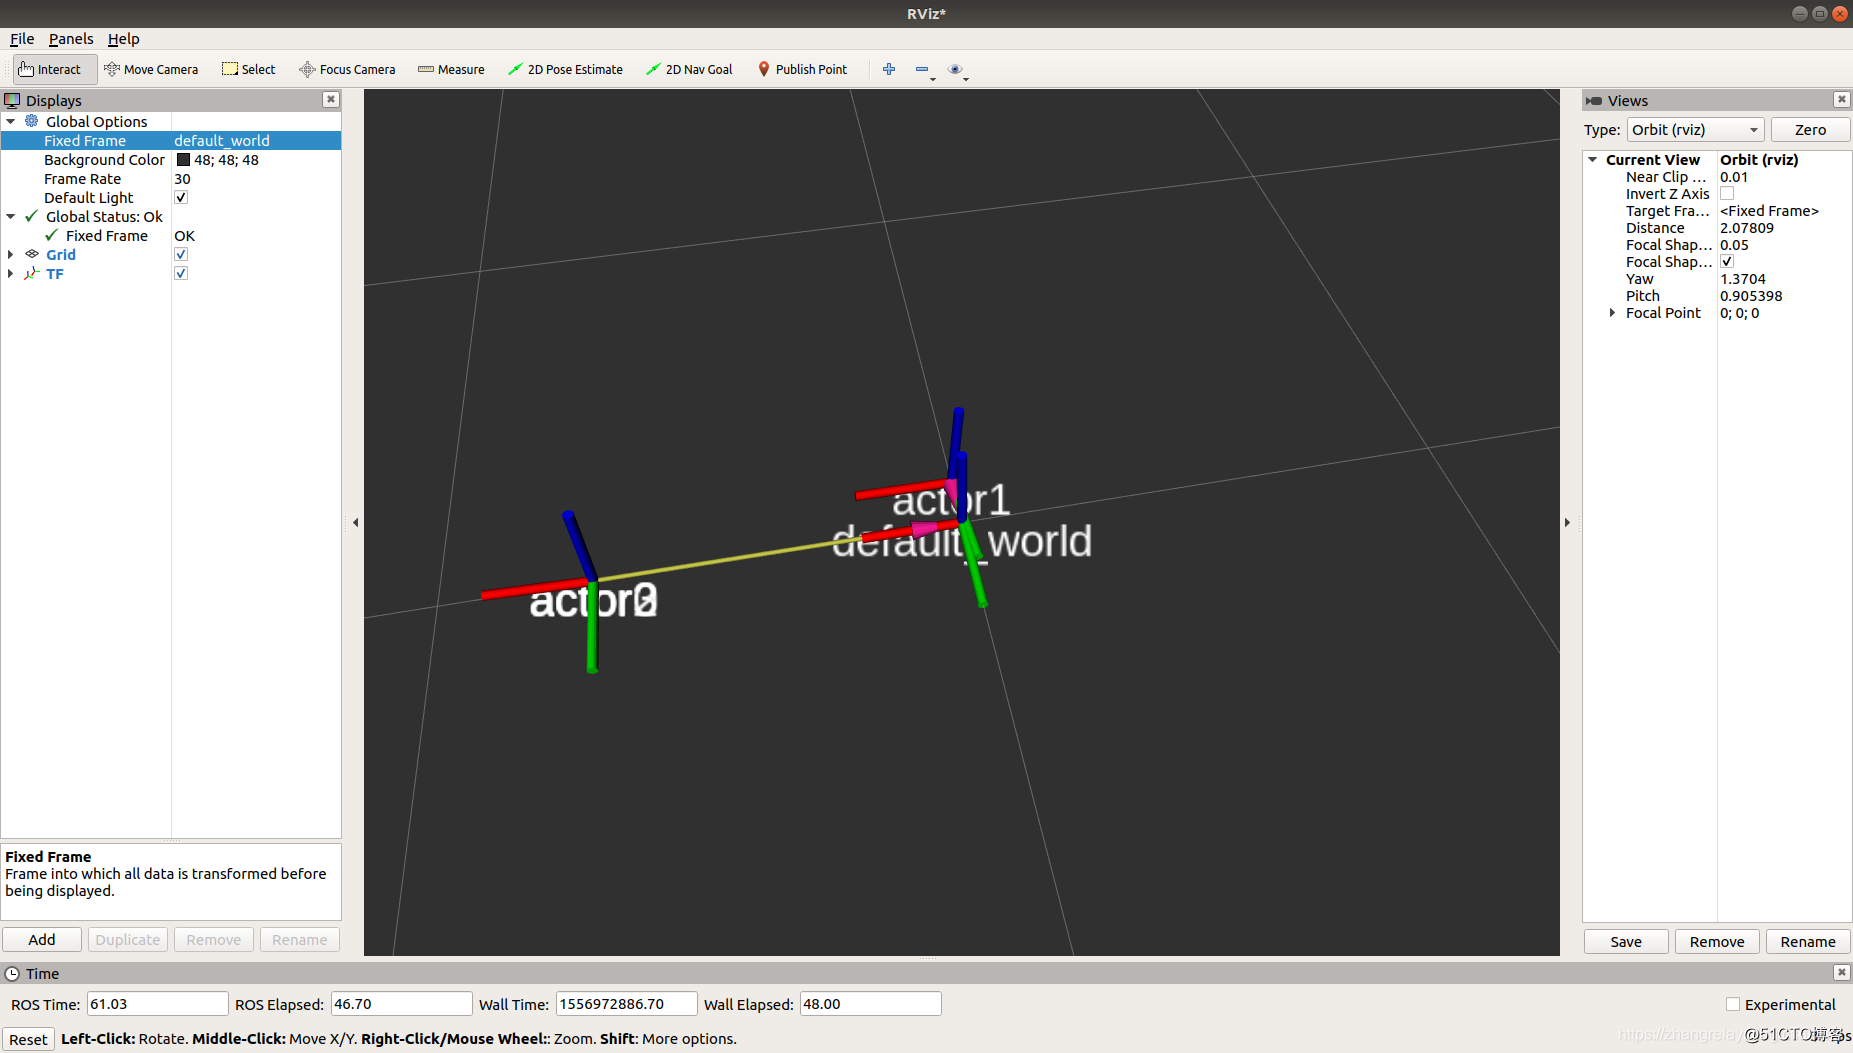
Gazebo有一个示范世界,演员四处移动,同时避开障碍物。看看它在运行:
gazebo worlds/cafe.worldSDF中的插件
就像模型一样,可以为任何actor编写自定义插件,并在SDF描述中分配插件。来看看 cafe.world 中引用视频中某个演员的部分:
<actor name="actor1">
  <pose>0 1 1.25 0 0 0</pose>
  <skin>
    <filename>moonwalk.dae</filename>
    <scale>1.0</scale>
  </skin>
  <animation name="walking">
    <filename>walk.dae</filename>
    <scale>1.000000</scale>
    <interpolate_x>true</interpolate_x>
  </animation>
  <plugin name="actor1_plugin" filename="libActorPlugin.so">
    <target>0 -5 1.2138</target>
    <target_weight>1.15</target_weight>
    <obstacle_weight>1.8</obstacle_weight>
    <animation_factor>5.1</animation_factor>
    <ignore_obstacles>
      <model>cafe</model>
      <model>ground_plane</model>
    </ignore_obstacles>
  </plugin>
</actor>
可以看到,不是给出要遵循的特定路点列表,而是给出了一个插件。在插件标签内,有几个参数可以专门针对这个插件进行调整。我们不会详细介绍插件的工作原理,这里的目的是展示一些参数可以暴露出来,确定轨迹的逻辑将在插件内部。
插件C ++代码
ActorPlugin可在此处找到 该源代码。而 这里 是头。
第一个技巧是听这样的世界更新开始事件:
this->connections.push_back(event::Events::ConnectWorldUpdateBegin(
std::bind(&ActorPlugin::OnUpdate, this, std::placeholders::_1)));这样,指定一个回调,它将在每次迭代时调用。这是我们将更新演员轨迹的功能。让看一下插件在该函数中的作用:ActorPlugin::OnUpdate
void ActorPlugin::OnUpdate(const common::UpdateInfo &_info)
{
  // Time delta
  double dt = (_info.simTime - this->lastUpdate).Double();

  ignition::math::Pose3d pose = this->actor->GetWorldPose().Ign();
  ignition::math::Vector3d pos = this->target - pose.Pos();
  ignition::math::Vector3d rpy = pose.Rot().Euler();

  double distance = pos.Length();

  // Choose a new target position if the actor has reached its current
  // target.
  if (distance < 0.3)
  {
    this->ChooseNewTarget();
    pos = this->target - pose.Pos();
  }
它首先检查当前信息,如时间和演员姿势。如果它已经到达目标目的地,选择一个新目的地。
  // Normalize the direction vector, and apply the target weight
  pos = pos.Normalize() * this->targetWeight;

  // Adjust the direction vector by avoiding obstacles
  this->HandleObstacles(pos);

  // Compute the yaw orientation
  ignition::math::Angle yaw = atan2(pos.Y(), pos.X()) + 1.5707 - rpy.Z();
  yaw.Normalize();

  // Rotate in place, instead of jumping.
  if (std::abs(yaw.Radian()) > GZ_DTOR(10))
  {
    pose.Rot() = ignition::math::Quaterniond(1.5707, 0, rpy.Z()+
        yaw.Radian()*0.001);
  }
  else
  {
    pose.Pos() += pos * this->velocity * dt;
    pose.Rot() = ignition::math::Quaterniond(1.5707, 0, rpy.Z()+yaw.Radian());
  }

  // Make sure the actor stays within bounds
  pose.Pos().X(std::max(-3.0, std::min(3.5, pose.Pos().X())));
  pose.Pos().Y(std::max(-10.0, std::min(2.0, pose.Pos().Y())));
  pose.Pos().Z(1.2138);
然后继续计算目标姿势,同时考虑障碍物并确保我们有平稳的运动。以下步骤是最重要的,因为它们涉及特定于actor的API。
  // Distance traveled is used to coordinate motion with the walking
  // animation
  double distanceTraveled = (pose.Pos() -
      this->actor->GetWorldPose().Ign().Pos()).Length();

  this->actor->SetWorldPose(pose, false, false);
  this->actor->SetScriptTime(this->actor->ScriptTime() +
    (distanceTraveled * this->animationFactor));
  this->lastUpdate = _info.simTime;
}首先将actor的世界姿势设置为静态模型SetWorldPose。但这不会触发动画。这是通过告诉演员它的骨架动画应该在哪个点来完成的SetScriptTime。
总之,在编写自己的插件时,可以使用您选择的逻辑在每个时间步骤定义所需的姿势。另外,不要忘记选择适当的脚本时间来同步动画。在此处查看该类 的完整API 。physics::Actor
中级教程:连接到ROS 1.0
概述
Velodyne传感器功能齐全,但没有像ROS这样的机器人中间件的插件。使用Gazebo和ROS的好处之一是它可以在现实世界和模拟世界之间轻松切换。为了实现这一目标,需要让我们的传感器与ROS生态系统很好地配合。
添加ROS传输修改当前的插件以包含ROS传输机制,其方式与我们在前一个教程中添加Gazebo传输机制的方式类似。
-
将头文件添加到文件中。
velodyne_plugin.cc#include <thread> #include "ros/ros.h" #include "ros/callback_queue.h" #include "ros/subscribe_options.h" #include "std_msgs/Float32.h" -
向插件添加一些成员变量。
/// \brief A node use for ROS transport private: std::unique_ptr<ros::NodeHandle> rosNode; /// \brief A ROS subscriber private: ros::Subscriber rosSub; /// \brief A ROS callbackqueue that helps process messages private: ros::CallbackQueue rosQueue; /// \brief A thread the keeps running the rosQueue private: std::thread rosQueueThread; -
在
Load函数结束时,添加以下内容。// Initialize ros, if it has not already bee initialized. if (!ros::isInitialized()) { int argc = 0; char **argv = NULL; ros::init(argc, argv, "gazebo_client", ros::init_options::NoSigintHandler); } // Create our ROS node. This acts in a similar manner to // the Gazebo node this->rosNode.reset(new ros::NodeHandle("gazebo_client")); // Create a named topic, and subscribe to it. ros::SubscribeOptions so = ros::SubscribeOptions::create<std_msgs::Float32>( "/" + this->model->GetName() + "/vel_cmd", 1, boost::bind(&VelodynePlugin::OnRosMsg, this, _1), ros::VoidPtr(), &this->rosQueue); this->rosSub = this->rosNode->subscribe(so); // Spin up the queue helper thread. this->rosQueueThread = std::thread(std::bind(&VelodynePlugin::QueueThread, this)); -
如果仔细阅读代码,会注意到需要两个新功能:
OnRosMsg和QueueThread。现在加上这些。/// \brief Handle an incoming message from ROS /// \param[in] _msg A float value that is used to set the velocity /// of the Velodyne. public: void OnRosMsg(const std_msgs::Float32ConstPtr &_msg) { this->SetVelocity(_msg->data); } /// \brief ROS helper function that processes messages private: void QueueThread() { static const double timeout = 0.01; while (this->rosNode->ok()) { this->rosQueue.callAvailable(ros::WallDuration(timeout)); } } -
要处理的最后一项是cmake构建。
- 打开。
CMakeLists.txt -
修改文件的顶部部分如下所示。
cmake_minimum_required(VERSION 2.8 FATAL_ERROR) find_package(roscpp REQUIRED) find_package(std_msgs REQUIRED) include_directories(${roscpp_INCLUDE_DIRS}) include_directories(${std_msgs_INCLUDE_DIRS}) -
修改插件的目标链接库。
target_link_libraries(velodyne_plugin ${GAZEBO_LIBRARIES} ${roscpp_LIBRARIES}) -
现在应该是这样的。
CMakeLists.txtcmake_minimum_required(VERSION 2.8 FATAL_ERROR) find_package(roscpp REQUIRED) find_package(std_msgs REQUIRED) include_directories(${roscpp_INCLUDE_DIRS}) include_directories(${std_msgs_INCLUDE_DIRS}) # Find Gazebo find_package(gazebo REQUIRED) include_directories(${GAZEBO_INCLUDE_DIRS}) link_directories(${GAZEBO_LIBRARY_DIRS}) set(CMAKE_CXX_FLAGS "${CMAKE_CXX_FLAGS} ${GAZEBO_CXX_FLAGS}") # Build our plugin add_library(velodyne_plugin SHARED velodyne_plugin.cc) target_link_libraries(velodyne_plugin ${GAZEBO_LIBRARIES} ${roscpp_LIBRARIES}) # Build the stand-alone test program add_executable(vel vel.cc) if (${gazebo_VERSION_MAJOR} LESS 6) include(FindBoost) find_package(Boost ${MIN_BOOST_VERSION} REQUIRED system filesystem regex) target_link_libraries(vel ${GAZEBO_LIBRARIES} ${Boost_LIBRARIES}) else() target_link_libraries(vel ${GAZEBO_LIBRARIES}) endif()
- 打开。
-
确保已经成功配置好ROS:
source /opt/ros/<DISTRO>/setup.bash -
重新编译插件。
cd ~/velodyne_plugin/build
cmake ../
make
我们现在可以像往常一样加载Gazebo插件,它将监听ROS主题以获取传入的浮动消息。然后,这些消息将用于设置Velodyne的旋转速度。
-
开始
roscoresource /opt/ros/<DISTRO>/setup.bash roscore -
在新的终端,启动Gazebo
cd ~/velodyne_plugin/build source /opt/ros/<DISTRO>/setup.bash gazebo ../velodyne.world -
在新终端中,用于
rostopic发送速度消息。source /opt/ros/<DISTRO>/setup.bash rostopic pub /my_velodyne/vel_cmd std_msgs/Float32 1.0 -
更改上述命令的最后一个数字以设置不同的速度。
恭喜,现在拥有构建自定义模型,共享模型和生成公共API的工具。玩得开心,快乐模拟!
更多文章请关注《万象专栏》
转载请注明出处:https://www.wanxiangsucai.com/read/cv11915